1. Utangulizi
This manual provides detailed instructions for the setup, operation, and maintenance of your Pisichen 16-inch 1920x1200P Touch Panel Portable Monitor. Please read this manual thoroughly before using the product to ensure proper functionality and to prevent damage.

Image 1.1: The Pisichen 16-inch Portable Monitor, showcasing onyesho lake mahiri na muundo mwembamba.
2. Taarifa za Usalama
- Usiweke kifuatiliaji kwenye mvua au unyevu ili kuepuka mshtuko wa umeme au hatari za moto.
- Usifungue ufuatiliaji casing. Rejelea huduma zote kwa wafanyikazi waliohitimu.
- Epuka kuweka kichungi kwenye jua moja kwa moja au karibu na vyanzo vya joto.
- Use only the power adapter and cables provided or approved by the manufacturer.
- Clean the screen with a soft, lint-free cloth. Do not use liquid cleaners or aerosol sprays directly on the screen.
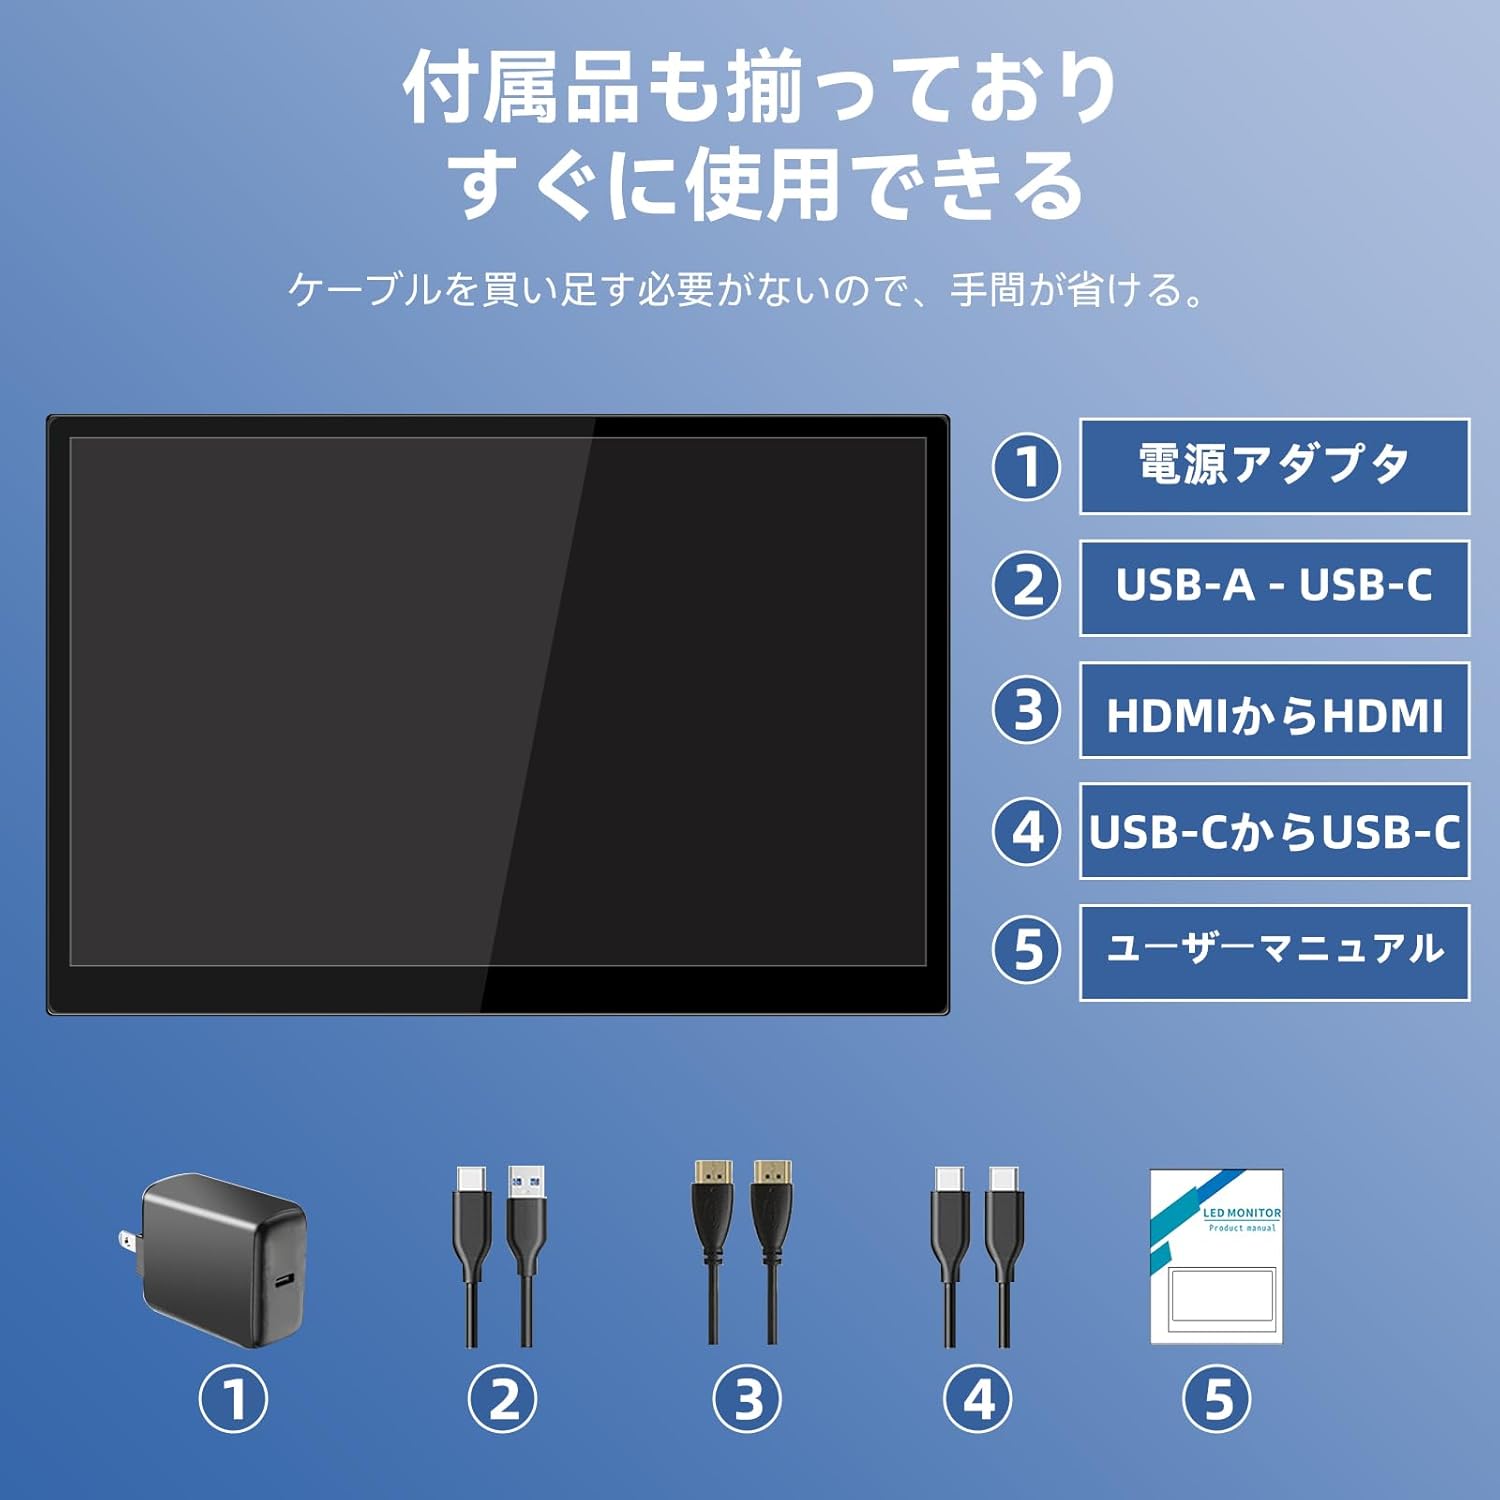
3. Yaliyomo kwenye Kifurushi
Tafadhali angalia kifurushi kwa vitu vifuatavyo:
- Pisichen 16-inch Portable Monitor
- Adapta ya Nguvu
- Kebo ya USB-A hadi USB-C
- HDMI kwa Cable ya HDMI
- Kebo ya USB-C hadi USB-C
- Mwongozo wa Mtumiaji (hati hii)

Image 3.1: All items included in the product package, ready for immediate use.
4. Bidhaa Imeishaview
The monitor features multiple ports for versatile connectivity and control buttons for easy navigation of settings.
4.1. Bandari na Vifungo
Picha 4.1: Kina view of the monitor's interfaces, including audio port, USB-C ports, HDMI port, brightness controls, menu/OK button, volume/down button, and USB-A port.
- Mlango wa Sauti wa 3.5mm: Kwa kuunganisha vichwa vya sauti au spika za nje.
- USB-C Port 1 (Full-function): Supports power, video, and touch signal transmission.
- USB-C Port 2 (Full-function): Supports power, video, and touch signal transmission.
- Bandari ya HDMI: For video signal input from devices.
- Brightness Up / Power Button: Short press to increase brightness, long press to power on/off.
- Menu / OK Button: Press to open OSD menu, press again to confirm selection.
- Volume Down / Back Button: Short press to decrease volume, long press to go back in OSD menu.
- USB-A Port (OTG): Kwa kuunganisha panya au kibodi.
5. Kuweka
Follow these steps to connect your portable monitor to various devices.
5.1. Single Cable Connection (USB-C)
For devices with a full-function USB-C port (supporting DisplayPort Alternate Mode and power delivery), a single USB-C to USB-C cable can transmit video, audio, touch signals, and power.
- Connect one end of the USB-C to USB-C cable to a full-function USB-C port on your device (e.g., laptop, smartphone).
- Connect the other end to either USB-C Port 1 or USB-C Port 2 on the monitor.
- The monitor should automatically power on and display the content. Touch functionality will also be active.
5.2. Dual Cable Connection (HDMI + USB-C for Power/Touch)
For devices with an HDMI output, or if your USB-C port does not support power delivery, you will need two cables.
- Connect one end of the HDMI to HDMI cable to your device's HDMI output.
- Connect the other end to the HDMI Port on the monitor.
- Connect the power adapter to one of the monitor's USB-C ports (Port 1 or Port 2) for power.
- For touch functionality, connect the USB-A end of the USB-A to USB-C cable to your device's USB-A port, and the USB-C end to the other available USB-C port on the monitor.

Image 5.1: Illustration of different connection methods: single USB-C cable for power, video, and touch, and dual cable setup using HDMI for video and USB-C for power and touch.
6. Maagizo ya Uendeshaji
6.1. Washa/Zima
Long press the Brightness Up / Power Button (5) for approximately 3 seconds to power the monitor on or off.
6.2. Menyu ya Onyesho la Skrini (OSD).
Press the Menu / OK Button (6) to access the OSD menu. Use the Brightness Up / Power Button (5) and Volume Down / Back Button (7) to navigate through options. Press the Menu / OK Button (6) to confirm selections. Long press the Volume Down / Back Button (7) to exit the menu.
6.3. Utendaji wa Kugusa
The monitor supports 10-point capacitive multi-touch. Ensure a USB connection (via full-function USB-C or USB-A to USB-C cable) is established for touch input to work. The touch screen allows for intuitive interaction, including swiping, writing, and annotating.
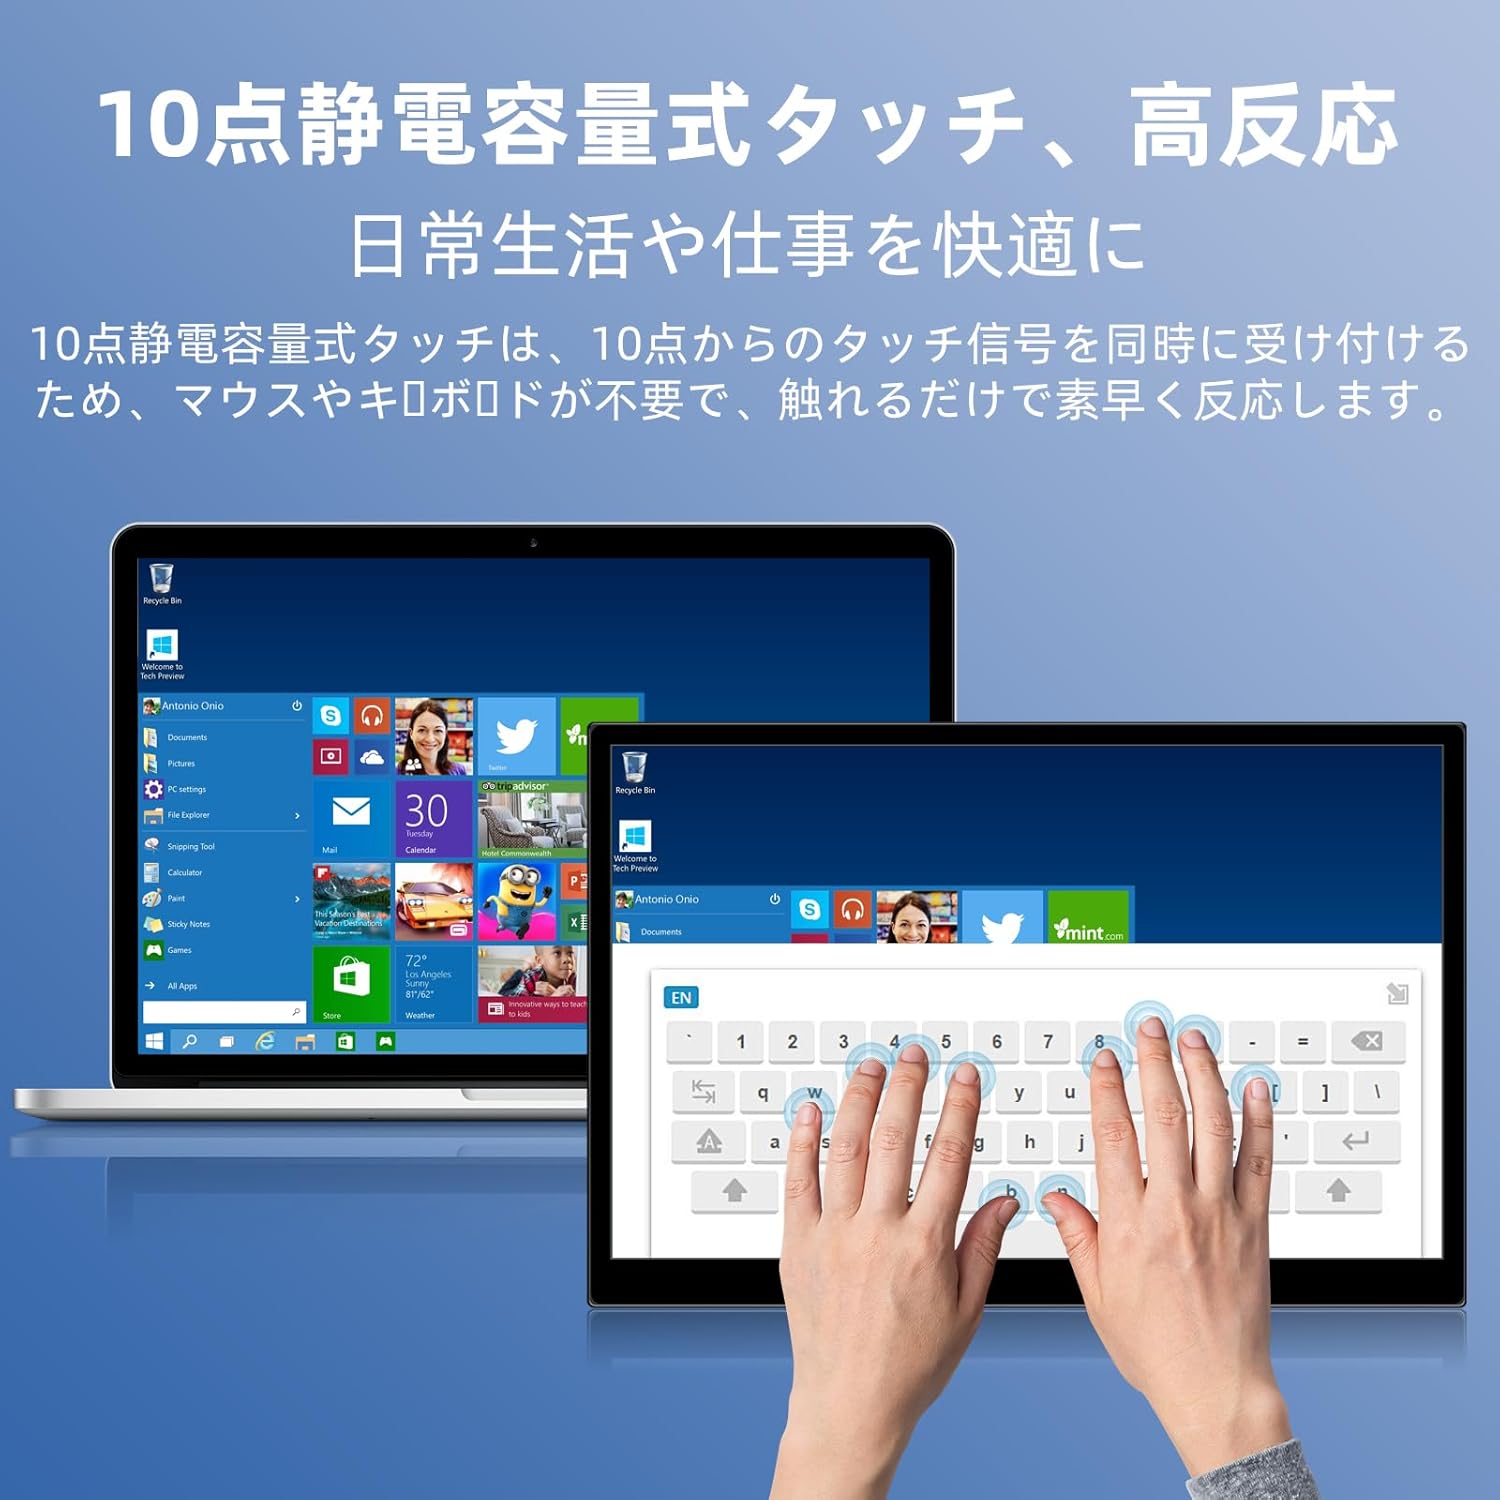
Image 6.1: A user demonstrating the responsive 10-point capacitive touch functionality on the portable monitor, enabling smooth interaction with on-screen content.
6.4. Njia za Kuonyesha
The monitor supports various display modes when connected to a computer:
- Hali ya Rudufu: Huakisi maudhui ya skrini yako kuu.
- Kuongeza Modi: Extends your desktop, providing more screen real estate for multitasking.
- Hali ya Pili ya Skrini: Hutumia kifuatiliaji kinachobebeka pekee kama onyesho.
6.5. Mwelekeo wa Skrini
The monitor supports both landscape and portrait orientations. You can adjust the display settings on your connected device (e.g., Windows Display Settings, macOS Display Preferences) to change the orientation as needed for different tasks like document viewing or design work.
6.6. HDR Technology
The monitor features HDR (High Dynamic Range) mode, which provides deeper and more realistic colors for an enhanced visual experience. This setting can typically be toggled within the OSD menu or your device's display settings.

Picha 6.2: Kutamples of the monitor's versatility, showing its use for entertainment, mobile productivity, and as an extended display for a home office.
7. Matengenezo
- Kusafisha skrini: Futa skrini kwa upole kwa kitambaa laini, kikavu, kisicho na pamba. Kwa alama za ukaidi, kidogo dampen the cloth with water or a screen-specific cleaner (apply to cloth, not directly to screen).
- Kusafisha Casing: Tumia kitambaa laini na kikavu kufuta kifaa casing. Epuka cleaners abrasive.
- Hifadhi: When not in use for extended periods, store the monitor in a cool, dry place, preferably in its original packaging or a protective sleeve.
- Usimamizi wa Cable: Epuka kupinda au kupotosha nyaya kupita kiasi ili kuzuia uharibifu.
8. Utatuzi wa shida
| Tatizo | Sababu inayowezekana | Suluhisho |
|---|---|---|
| No display / "No Signal" message | Muunganisho wa kebo usio sahihi, nguvu haitoshi, chanzo kisicho sahihi cha kuingiza data. | Ensure cables are securely connected. Verify the device's USB-C port supports video output. Connect the power adapter if using HDMI or if USB-C power is insufficient. Check OSD menu for correct input source. |
| Kitendaji cha kugusa hakifanyi kazi | No USB connection for touch, driver issue (rare). | Ensure the USB-C cable is full-function or that the USB-A to USB-C cable is connected for touch data. Restart the monitor and connected device. |
| Skrini inayumba | Unstable power, faulty cable, refresh rate mismatch. | Use the provided power adapter. Try a different cable. Adjust the refresh rate in your device's display settings. |
| Picha imepotoshwa au imenyooshwa | Incorrect aspect ratio settings. | Adjust the aspect ratio in the OSD menu or your device's display settings to match the monitor's native resolution (1920x1200). |

Image 8.1: Demonstrating the importance of correct aspect ratio settings to avoid image distortion.
9. Vipimo
| Kipengele | Vipimo |
|---|---|
| Chapa | Pisichen |
| Nambari ya Mfano | 16QTHCM-1200P |
| Ukubwa wa skrini | inchi 16 |
| Azimio | pikseli 1920 x 1200 (FHD) |
| Aina ya Paneli | IPS |
| ViewAngle | 178° |
| Kiwango cha Kuonyesha upya | 60 Hz |
| Uwiano wa Tofauti | 1000:1 |
| Mwangaza | 300 cd/m² |
| Rangi ya Gamut | 100% sRGB |
| Kina cha Rangi | Rangi Milioni 16.7 |
| Skrini ya kugusa | Mguso wa Uwezo wa Pointi 10 |
| Muunganisho | 2x Full-function USB-C 3.1, 1x HDMI, 1x USB-A (OTG), 1x 3.5mm Audio Jack |
| Msaada wa HDR | Ndiyo |
| VESA Mount Sambamba | Ndiyo |
| Vipimo vya Bidhaa (W x H x D) | 350 x 230 x 10 mm |
| Uzito | 1.62 kg |
10. Udhamini na Msaada
For warranty information and technical support, please refer to the warranty card included in your product package or contact Pisichen customer service through their official website or the retailer where the product was purchased. Please have your model number (16QTHCM-1200P) and purchase details ready when contacting support.


