
1. Utangulizi na Zaidiview
This manual provides comprehensive instructions for the assembly, operation, and maintenance of your Desky Single Sit Stand Desk. Designed for ergonomic well-being, this electric standing desk allows for seamless height adjustments to promote healthy work habits.
Key features include a smooth and quiet motor, three programmable height presets, and a robust frame capable of supporting significant weight.

Image 1: The Desky Single Sit Stand Desk, showcasing its adjustable height design with a monitor and laptop setup.
2. Taarifa Muhimu za Usalama
- Kikomo cha Uzito: Exceeding the maximum weight recommendation of 176.4 lbs (80 kg) may compromise the stability and longevity of the desk.
- Hakikisha miunganisho yote ni salama kabla ya operesheni.
- Weka watoto na wanyama wa kipenzi mbali na dawati wakati wa kurekebisha urefu.
- Epuka kuweka vimiminika moja kwa moja kwenye paneli ya kudhibiti au vipengele vya magari.
3. Yaliyomo kwenye Kifurushi
Before beginning assembly, ensure all components listed below are present and undamaged:
- Juu ya Dawati
- Desk Frame (includes crossbars and side brackets)
- Motorized Electric Desk Legs (2)
- Desk Hand Controller
- Sanduku la Nguvu
- GPO Wall Plug
- Kuunganisha Kamba
- Sawazisha Fimbo
- Hardware (screws, hex key)
- Sticky Cable Ties
4. Kuweka na Kukusanya
The Desky Single Sit Stand Desk is designed for easy, tool-free installation. For a visual guide, please refer to the official assembly video below. It is recommended to assemble the desk in the location where it will be used to avoid unnecessary movement.
Video 1: Official Desky Single Sit Stand Desk Assembly Guide. This video demonstrates the step-by-step process of putting together your desk, from unboxing to final power-up.
4.1. Prepare Your Workspace
Clear an open, clean, and dry area for assembly. It is advisable to keep the desktop box unopened until the frame is assembled to protect the surface.
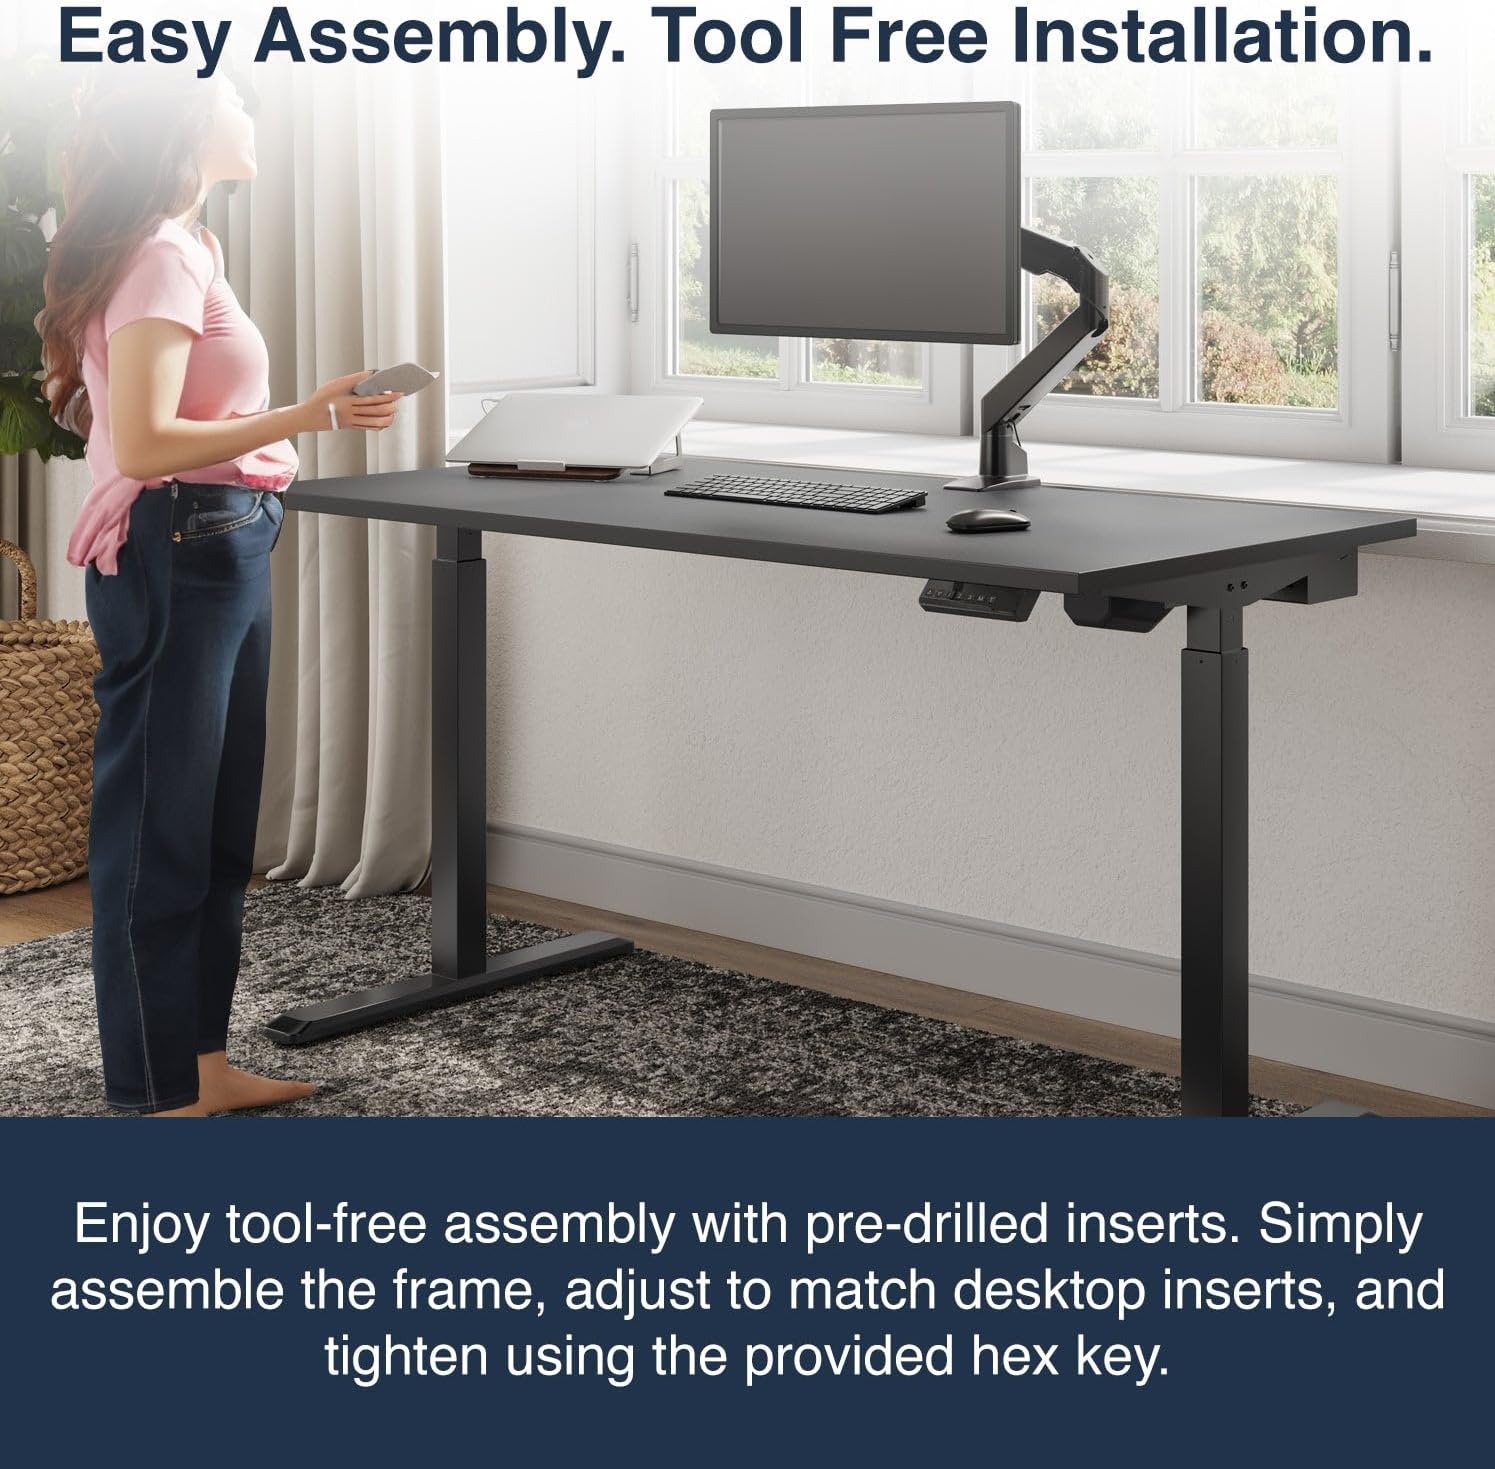
Image 2: The desk frame assembled, highlighting the ease of setup with pre-drilled inserts.
4.2. Kukusanya Fremu
- Crossbar Adjustment: Loosen the grub screws on the crossbar ends using the provided hex key. Slide the crossbar ends apart to the desired width, then retighten the grub screws to secure them.
- Ambatanisha Miguu:
- Position the leg with the lifting motor facing inward and the cord away from the frame. Match the two widely spaced holes on the crossbar with the bumps on the leg.
- Press the leg firmly against the crossbar until flush. Insert and tighten two screws through the crossbar into the leg using the hex key.
- Repeat for the opposite leg, ensuring the single hole for the sync rod faces inward. Match the four bumps on the leg with the holes on the crossbar, press firmly, and secure with two screws.
- Ambatisha Mabano ya Upande: Attach the side brackets to the back of each leg. Ensure the cable management channel hole faces the opposite side to the motor. Position the bracket flush against the leg, aligning holes and bumps. Insert and tighten two screws to secure. Repeat for the other side.
- Position Desktop: Carefully place the desktop with its bottom side facing up. Position the assembled frame onto the desktop, ensuring the gearbox faces the front. The front of the desktop is identified by small pre-drilled holes on either side of the edge.
- Adjust Frame Width: Slightly loosen the grub screws on the crossbar ends. Adjust the frame width to align the six pre-drilled holes on the desktop with those on the side brackets and center crossbar. Retighten the grub screws.
- Ambatisha Miguu: With the pads facing up, position each foot on top of its respective leg, aligning all four holes. Insert and slightly hand-tighten four screws into the leg. Then, tighten them firmly in a criss-cross pattern to ensure the feet are level. Repeat for the other foot.
- Install Cable Management Tray (Optional): Align the mounting holes on the hangers with the screw holes on the inside of the cable management tray. Hold the hanger in place, flip the tray over, and insert two screws through the bottom of the tray to attach the hanger securely. Repeat for the opposite hanger.
- Attach Cable Management Tray to Frame: From the back of the desk, with the tray facing upside down and hangers pointing away, gently lift the frame and slide the cable management tray into place. Position it either in the middle or close to the motor end, ensuring it faces away from the motor side. Tighten the screws on the tray hangers to secure it to the frame.
- Salama Fremu kwenye Eneo-kazi: Ensure all holes on the frame align with the holes on the desktop. Insert and tighten all six screws (two in the middle of the frame, two on each side bracket) into the pre-drilled holes to firmly fix the desktop and frame together.
- Insert Sync Rod: Insert the sync rod into the leg without the motor. Unscrew the nut to loosen the rod and extend it to meet the opposite leg. Match the hex-shaped rod with the hex-shaped opening in the leg (you may need to rotate it to fit). Press it in to secure. Undo the nut on the opposite end of the sync rod to extend it and position it onto the gearbox shaft. Tighten the middle nut on the sync rod to secure its length, then return to tighten the nut at the end of the rod inside the motor.
- Ambatisha Paneli ya Kudhibiti: Line up the pre-drilled holes on the desktop with those of the controller. Use two screws to secure the controller in place. It is recommended to leave them slightly loose until the desk is upright for final alignment.
- Flip the Desk: Carefully flip the desk over. This can be done by one person in stages, ensuring not to lean on the edge with the control panel. Alternatively, seek assistance for this step.
- Unganisha Nguvu: Connect the cables from the control panel to the control box, ensuring a tight connection. Then connect the motor to the control panel. Connect the control box to the power lead and plug it into a wall outlet.
5. Maagizo ya Uendeshaji
Your Desky Single Sit Stand Desk features an intuitive control panel for easy height adjustment and memory presets.
5.1. Marekebisho ya Urefu wa Msingi
- Tumia Mshale wa Juu (▲) kitufe cha kuinua dawati.
- Tumia Mshale wa Chini (▼) kitufe cha kupunguza dawati.
- The desk moves at approximately 1.5 inches per second and operates with a whisper-quiet motor (45db).
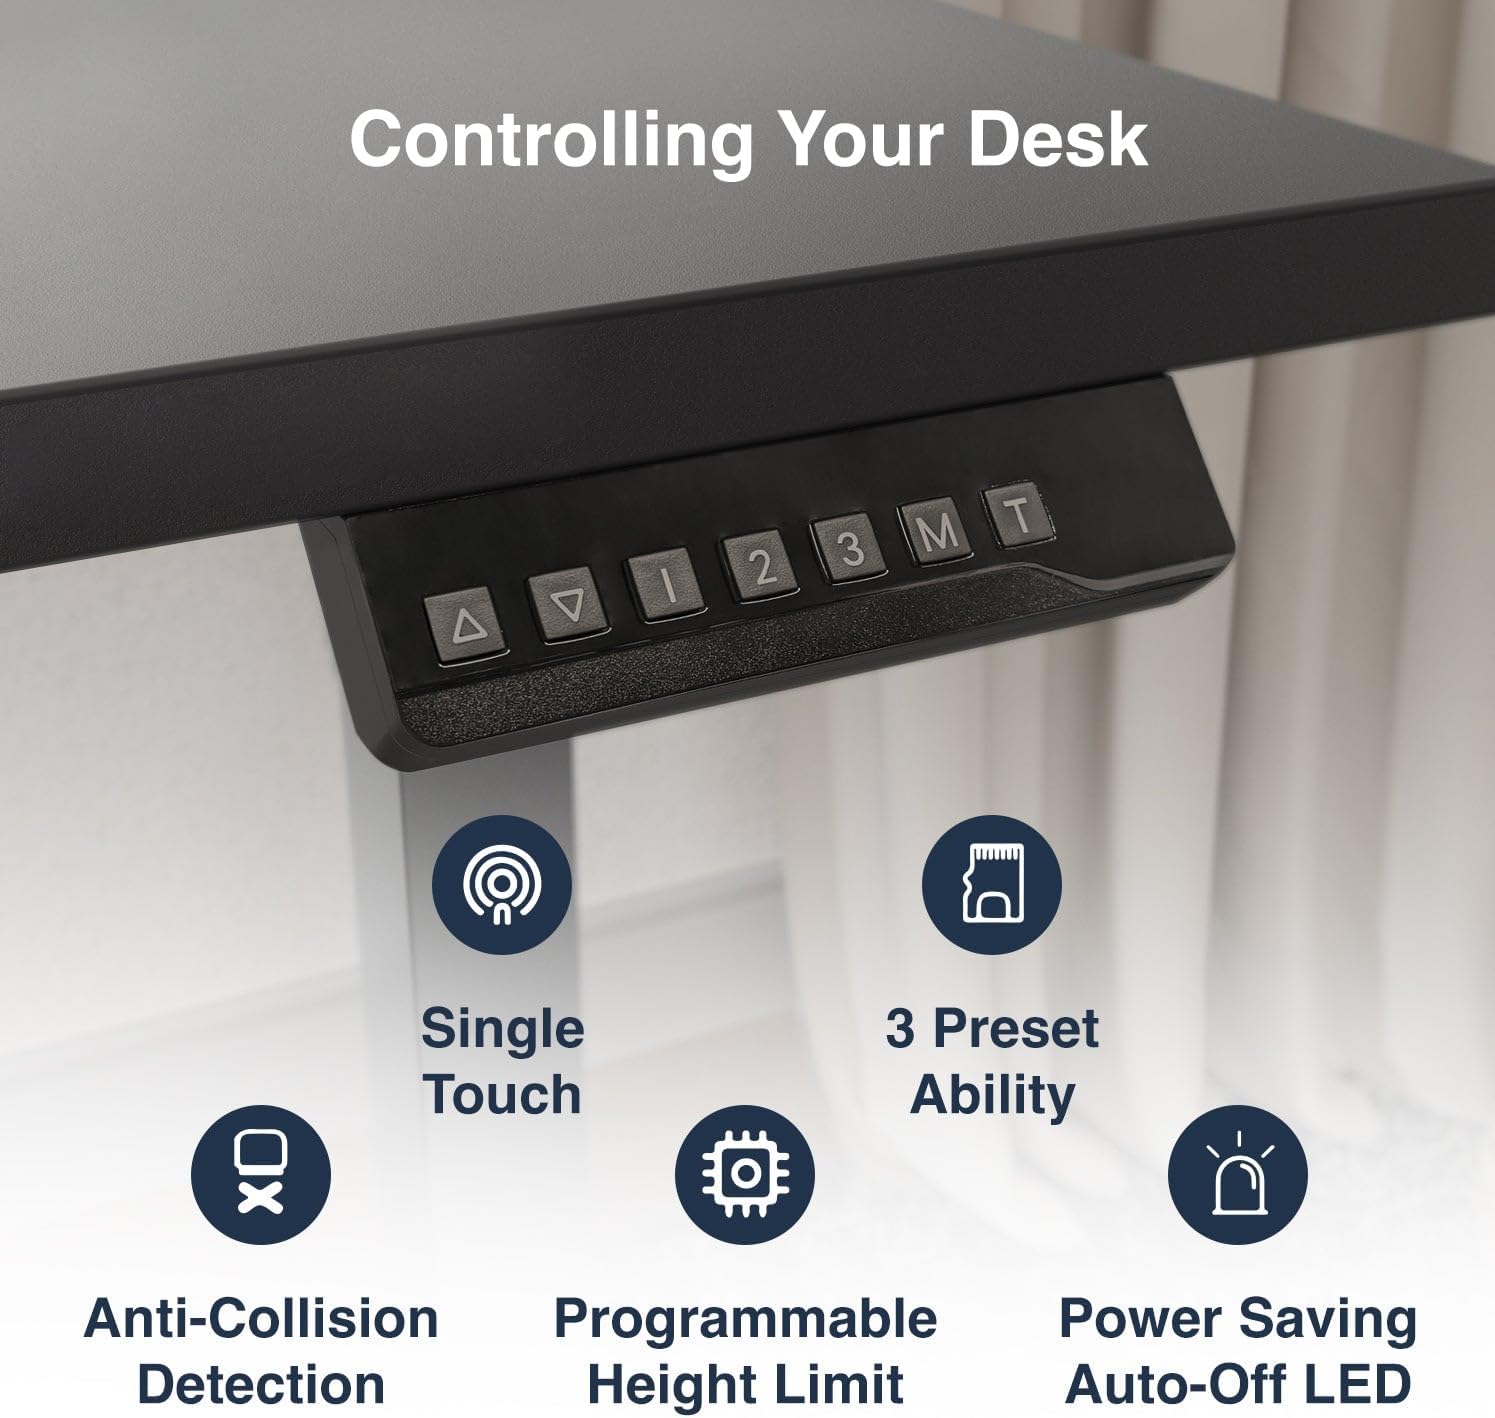
Image 3: The control panel, featuring buttons for height adjustment and memory presets.
5.2. Mipangilio ya Kumbukumbu
The desk features three programmable height memory presets:
- Rekebisha dawati hadi urefu unaotaka kwa kutumia mishale ya Juu/Chini.
- Bonyeza kwa 'M' kitufe. Onyesho litaonyesha 'S-'.
- Press one of the number buttons ('1', '2', au '3') kuhifadhi urefu wa sasa kwa uwekaji awali.
- Ili kukumbuka urefu uliohifadhiwa, bonyeza tu kitufe cha nambari kinacholingana.
5.3. Mfumo wa Kuzuia Mgongano
The desk is equipped with an anti-collision system that automatically stops movement if an obstruction is detected during adjustment, preventing damage to the desk or objects.
5.4. Usimamizi wa Cable
Utilize the integrated cable management system and sticky cable ties to keep your workspace organized and clutter-free.
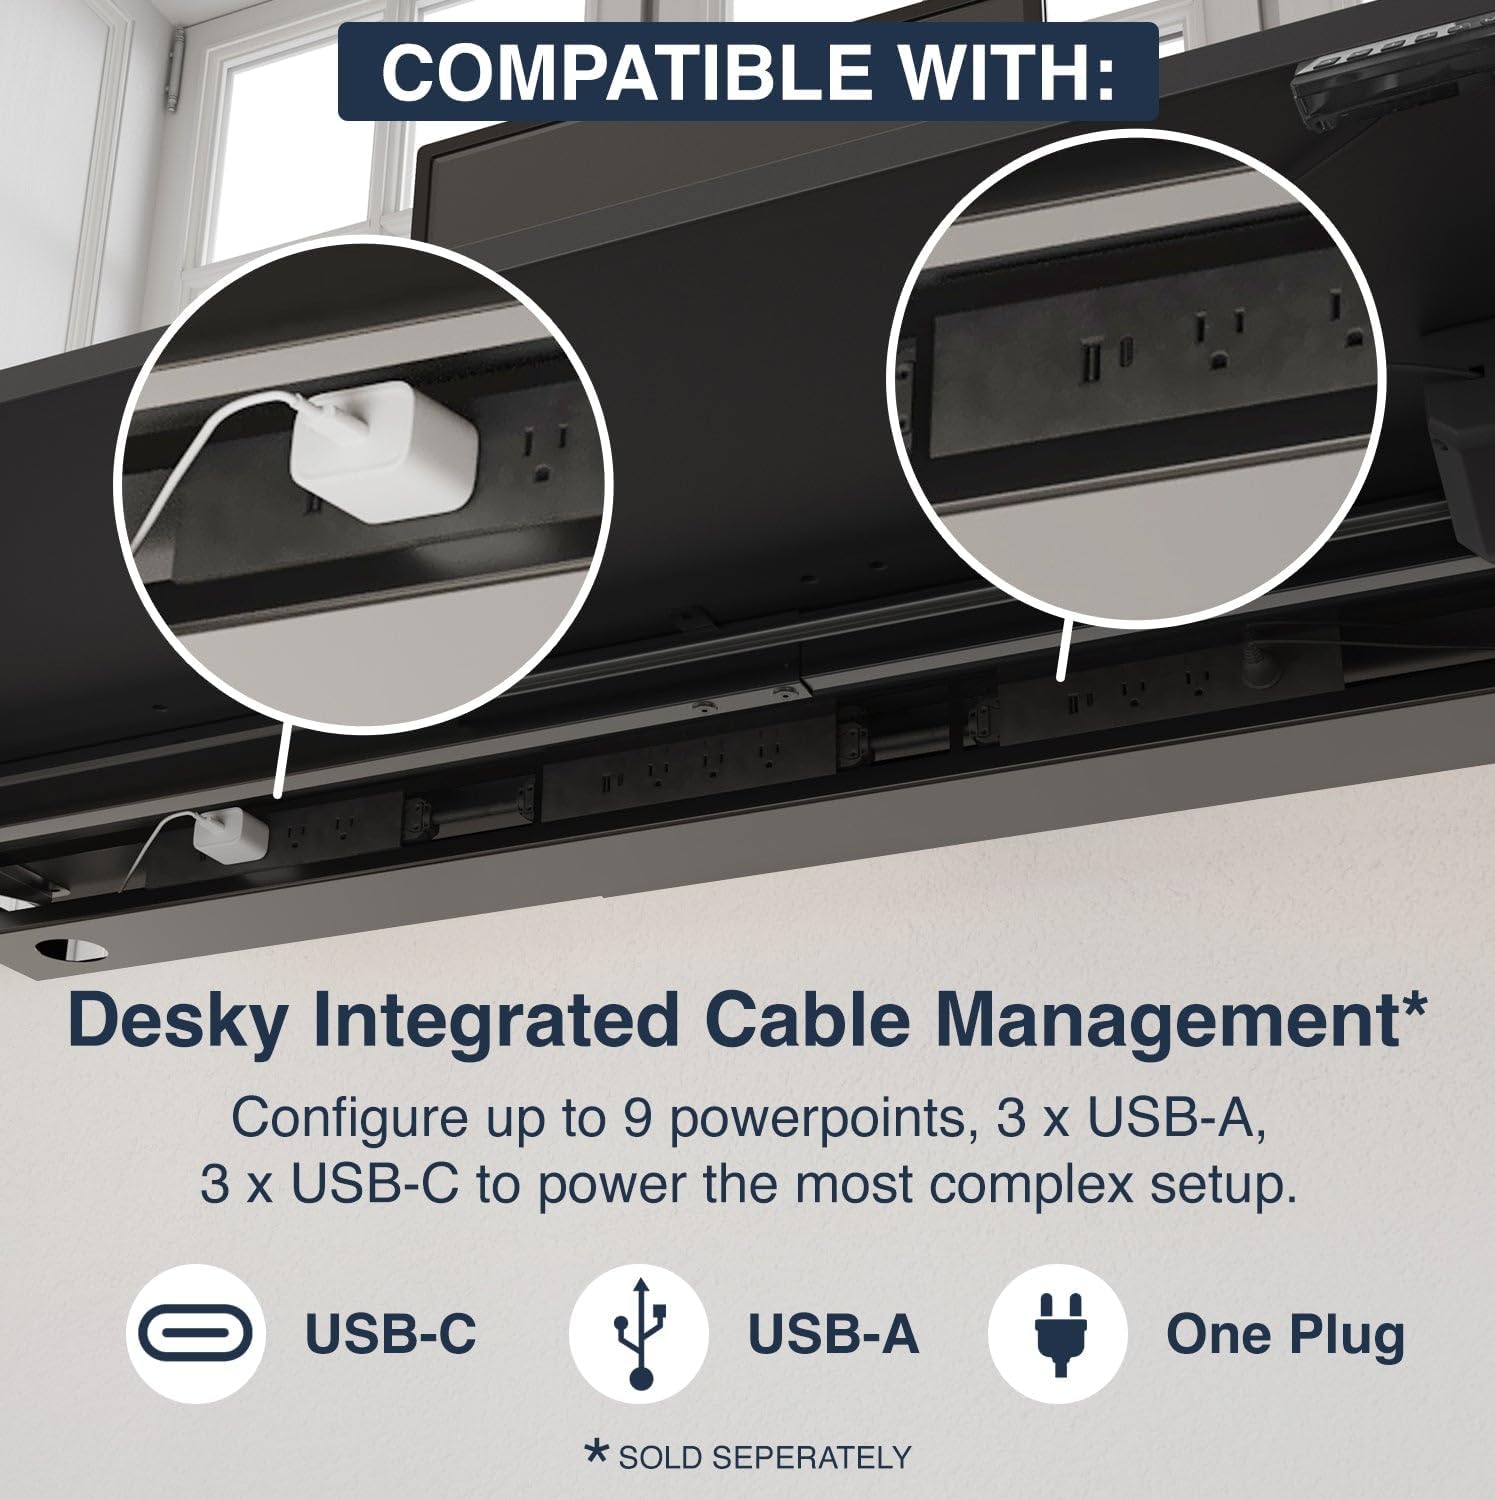
Image 4: Integrated cable management system, designed to keep cables tidy and out of sight.
6. Matengenezo
- Kusafisha: Futa eneo-kazi na fremu kwa laini, damp kitambaa. Epuka visafishaji abrasive au kemikali kali.
- Ukaguzi wa Mara kwa Mara: Mara kwa mara angalia skrubu na miunganisho yote ili kuhakikisha kuwa zinasalia kuwa ngumu na salama.
- Usimamizi wa Cable: Ensure cables are neatly managed and not interfering with the desk's movement.
7. Utatuzi wa shida
7.1. Resetting the Desk
If the desk is not functioning correctly or displaying an error code, a reset may resolve the issue:
- Turn off the power to the desk at the wall outlet.
- Wait for approximately 10 seconds for the system to completely power down.
- Turn the power back on at the wall outlet.
- Bonyeza na ushikilie Mshale wa Chini (▼) button until the desk reaches its lowest height.
- Endelea kushikilia Mshale wa Chini (▼) button until the display shows 'RST' or 'reset'. The desk will briefly move up and down, then display its lowest height (e.g., 73.0).
- The desk is now reset and ready for use.
For other issues, please refer to the support section or contact customer service.
8. Vipimo
| Kipengele | Maelezo |
|---|---|
| Chapa | Desky |
| Nambari ya Mfano | 7964320923970 |
| Vipimo vya Bidhaa | 29.53"D x 55"W x 37"H (Note: This appears to be a general dimension, actual desktop size is 70.9 x 29.5 in) |
| Desktop Size (Current Variant) | inchi 70.9 x 29.5 |
| Rangi | Black / Grey |
| Urefu wa chini | inchi 28.7 |
| Urefu wa Juu | inchi 48.4 |
| Mapendekezo ya Uzito wa Juu | Pauni 176.4 (kilo 80) |
| Nyenzo za Msingi | Aloi ya chuma |
| Maliza Aina | Laminate Decorative Surface |
| Aina ya Magari | Single Motor (Top-mounted for smooth power) |
| Kiwango cha Kelele | 45db (Whisper Quiet Operation) |
| Vipengele Maalum | 3-Stage Frame Design, 4 Height Memory Presets, Adjustable Height, Anti-Collision System, BIFMA Compliant, Dual Motor Lifting System (Note: Product title indicates 'Single Sit Stand Desk', but features mention 'Dual Motor Lifting System'. Please refer to product packaging for definitive motor configuration.), Ergonomically Suited for 95% of Users, Leading Stability and Strength, Tool Free Installation, Whisper Quiet Operation. |
| Mkutano Unaohitajika | Ndiyo |
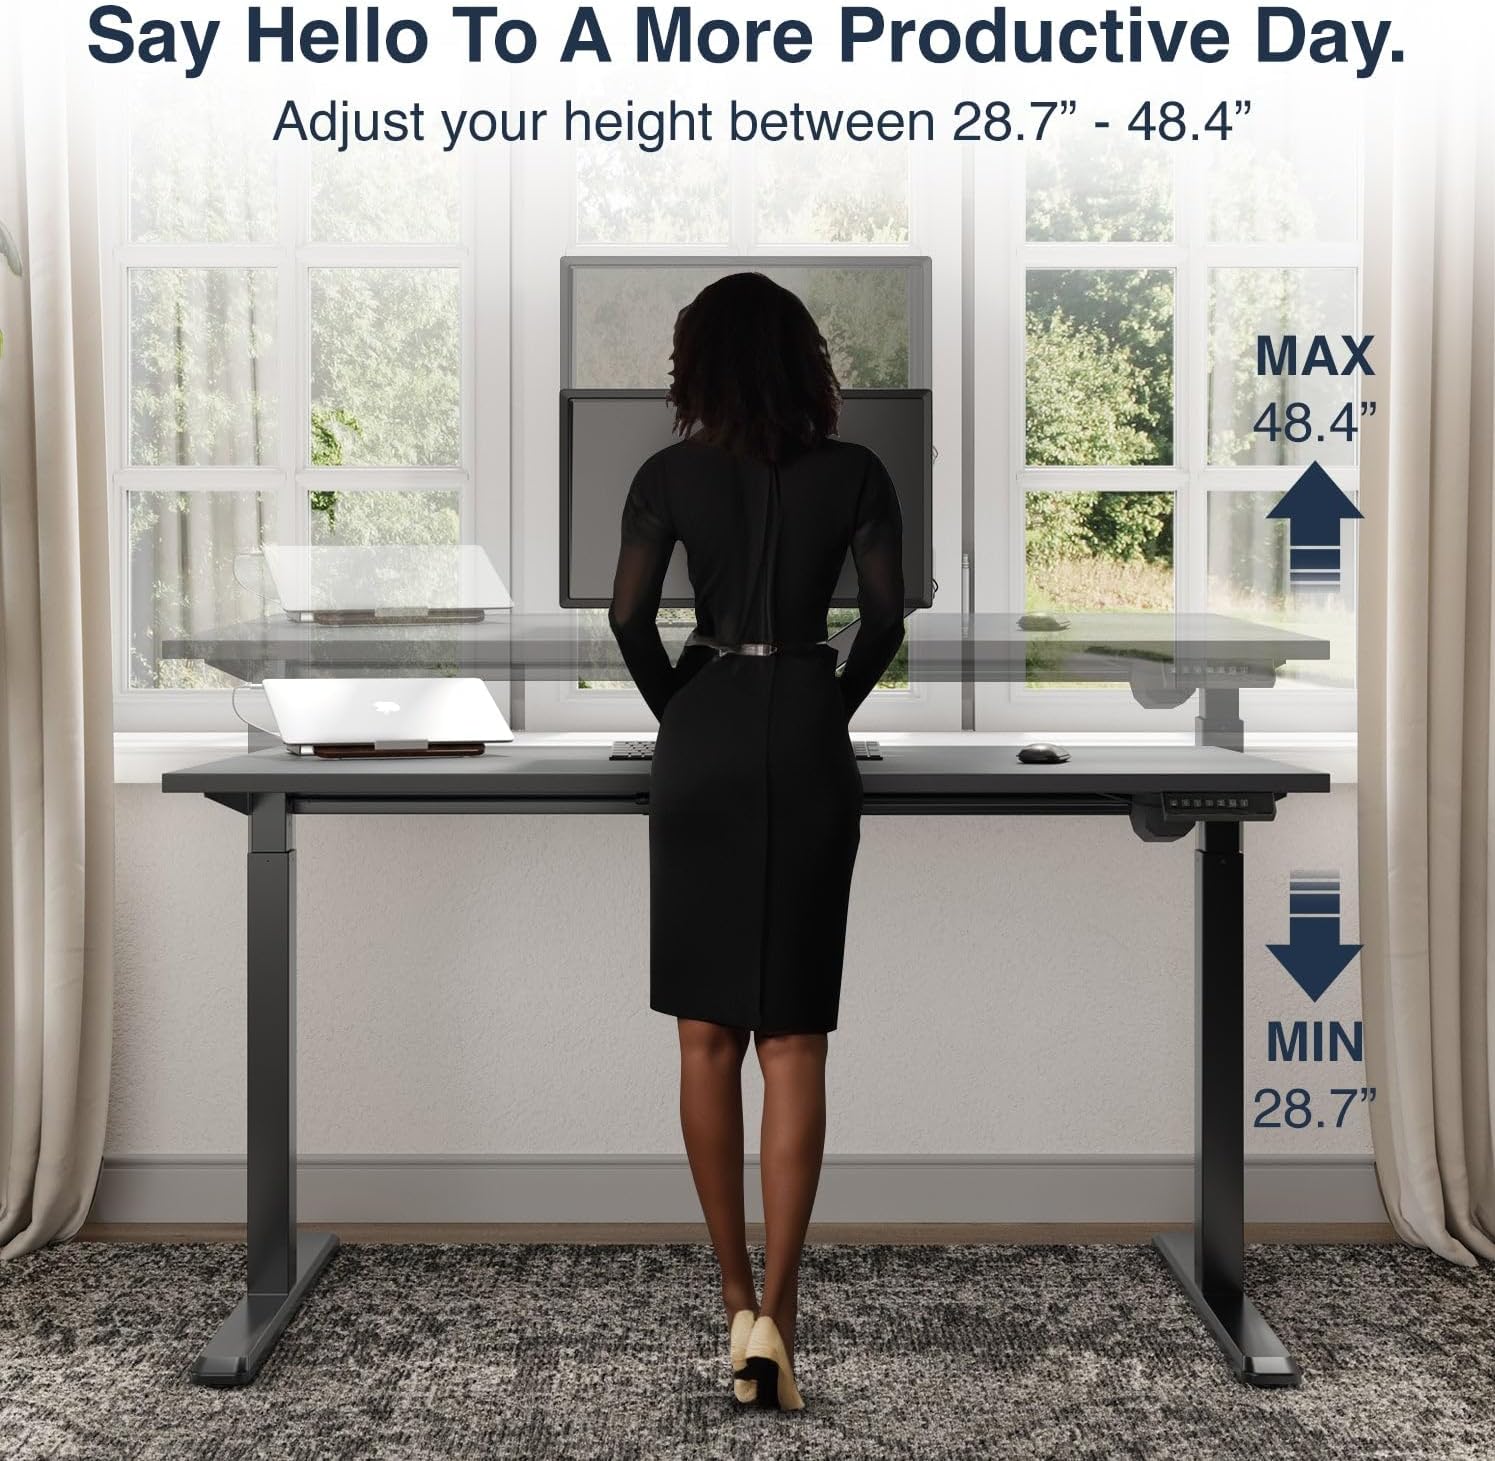
Image 5: Visual representation of the desk's adjustable height range, from 28.7" to 48.4".

Image 6: Demonstration of the desk's robust lifting capacity, supporting up to 176 lbs and tested for durability.
9. Udhamini na Msaada
9.1. Taarifa za Udhamini
Your Desky Single Sit Stand Desk comes with a 3-year supplier warranty, covering manufacturing defects and malfunctions under normal use conditions.
9.2. Msaada kwa Wateja
For any questions, technical assistance, or warranty claims, please contact Desky customer support through their official webtovuti au muuzaji ambapo bidhaa ilinunuliwa.
Tembelea desky.com.au for more information and additional resources.