1. Utangulizi
This manual provides essential information for the safe installation, operation, and maintenance of the Victron Energy Skylla-TG GMDSS Battery Charger, model SDTG2400302. This 24-Volt, 30 Amp charger is designed for various battery types and includes integrated GMDSS monitoring capabilities. Please read this manual thoroughly before using the product.
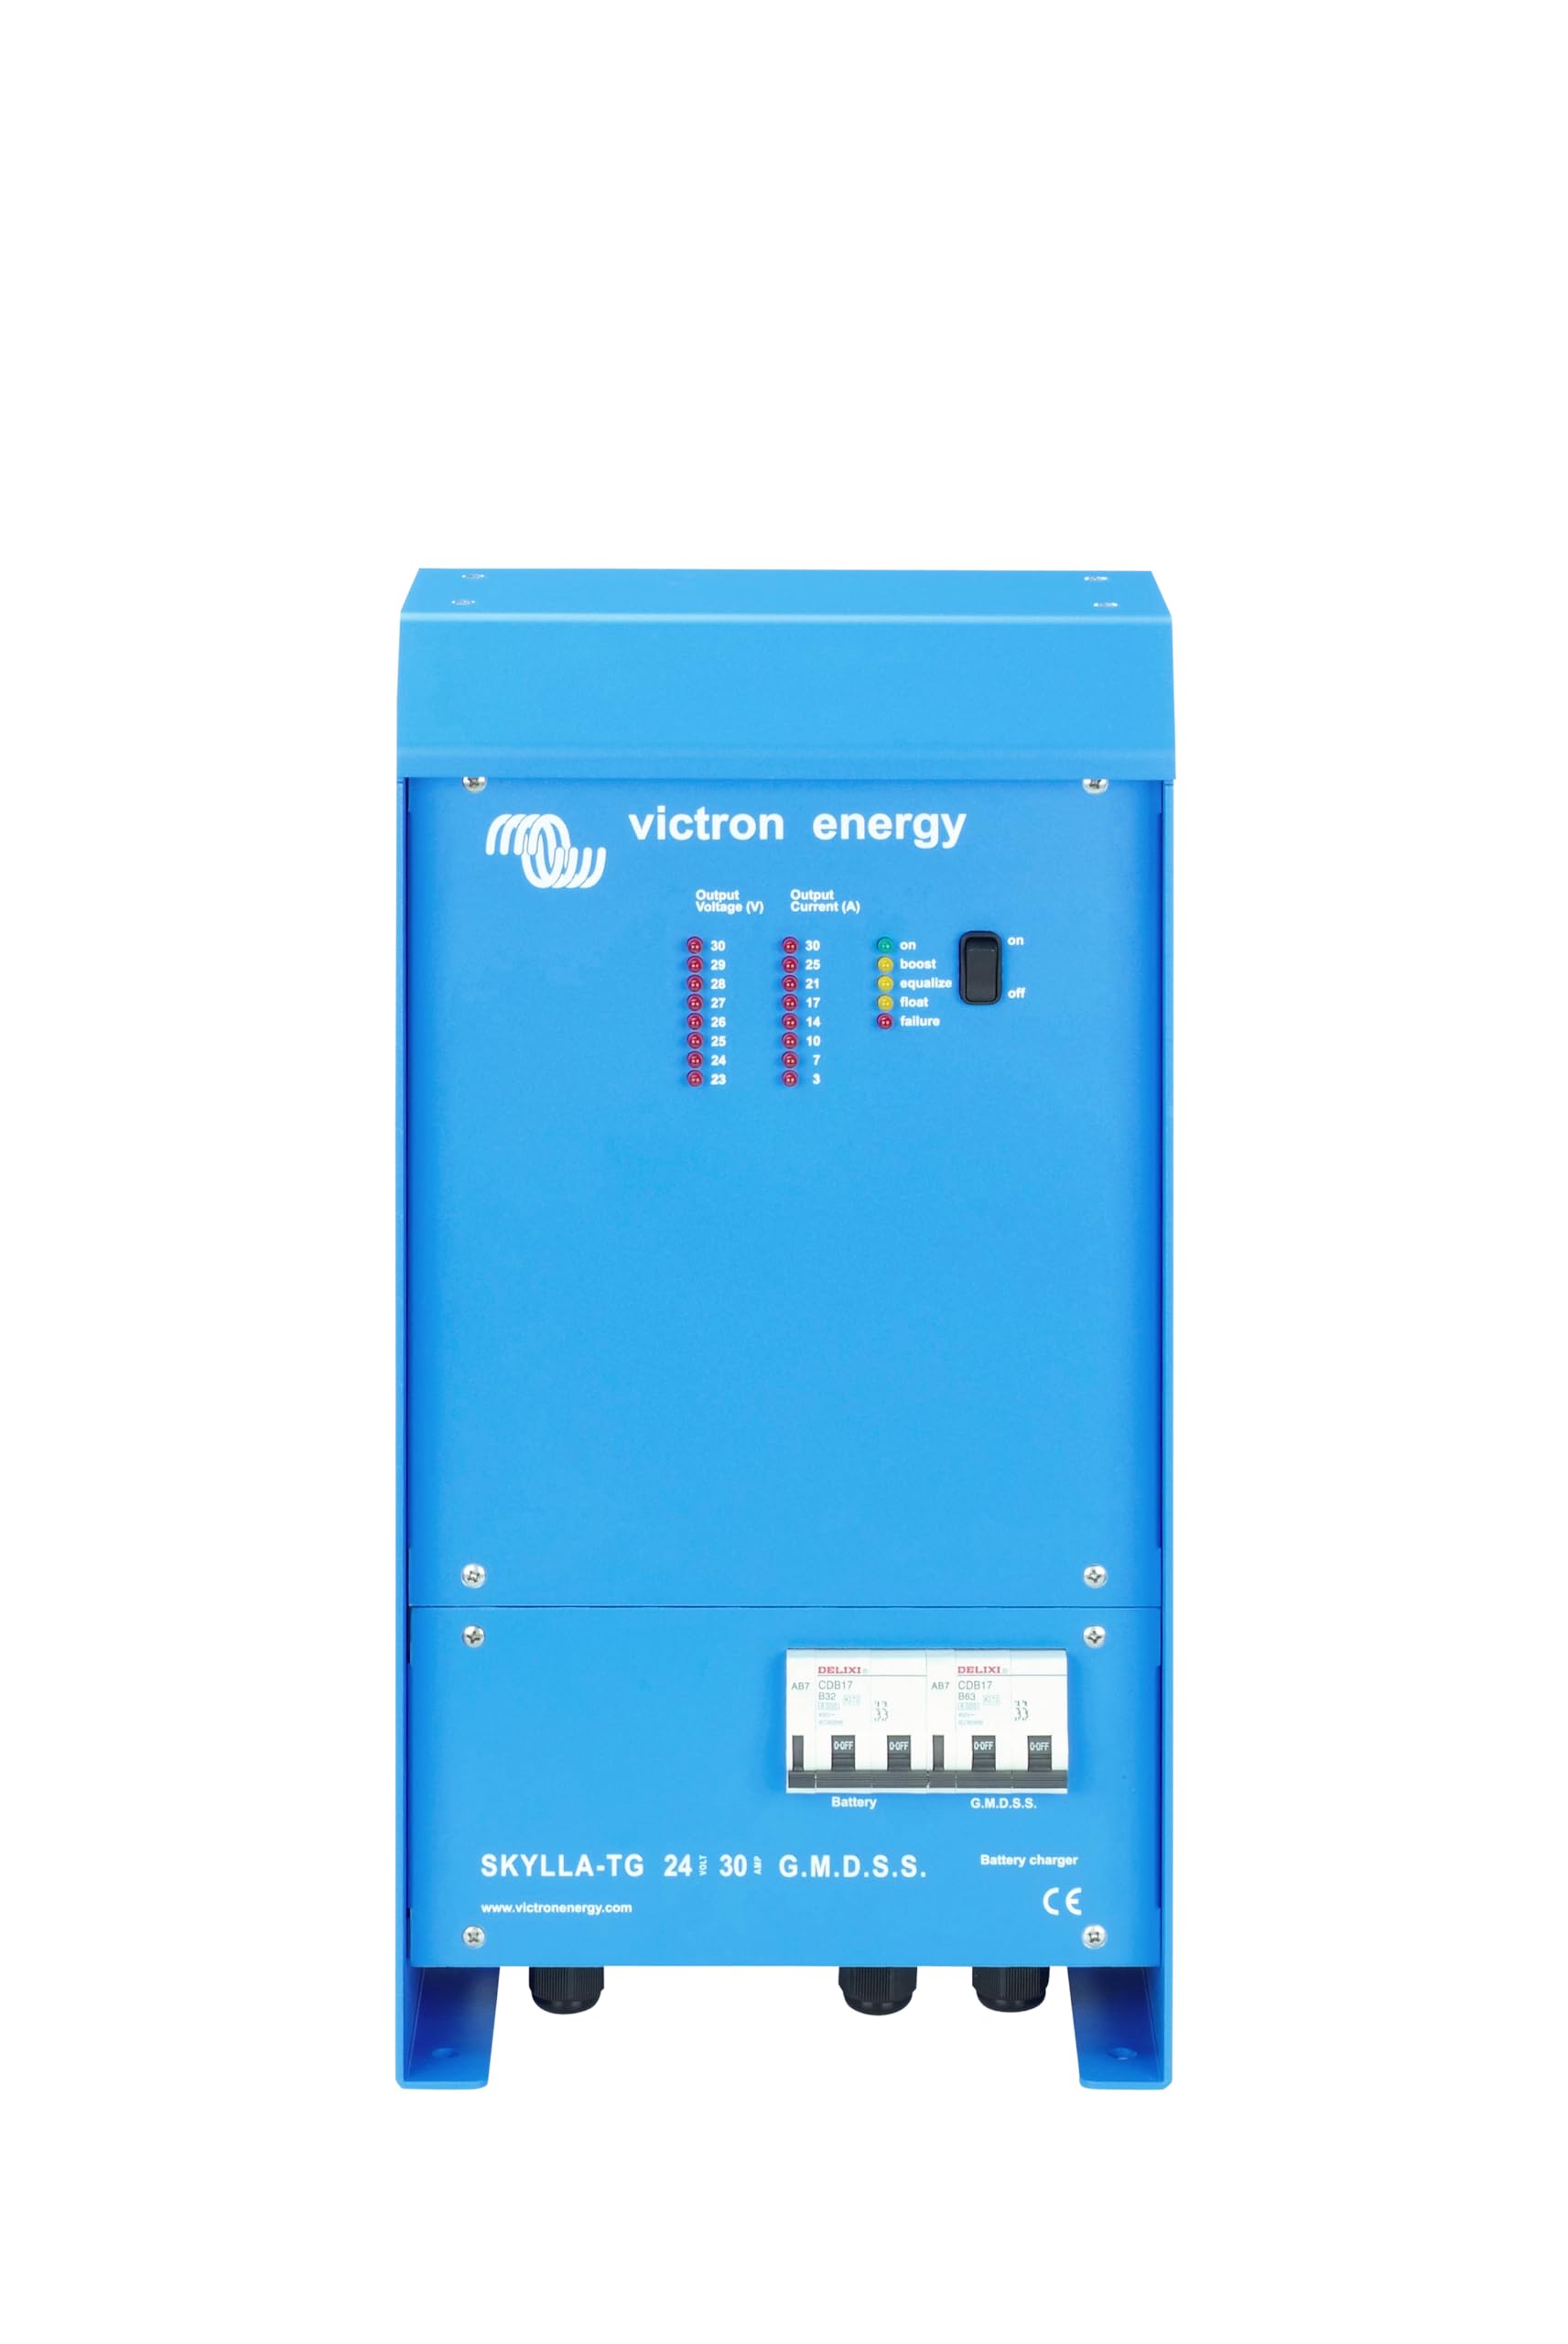
Figure 1: Victron Energy Skylla-TG GMDSS Battery Charger (SDTG2400302)
2. Taarifa za Usalama
Daima zingatia tahadhari zifuatazo za usalama ili kuzuia majeraha ya kibinafsi au uharibifu wa kifaa:
- Usalama wa Umeme: Installation and maintenance must be performed by qualified personnel. Disconnect AC power before making or breaking electrical connections.
- Usalama wa Betri: Batteries can produce explosive gases. Ensure adequate ventilation. Do not smoke or allow open flames near batteries. Wear eye protection.
- Uingizaji hewa: Ensure the charger is installed in a well-ventilated area to prevent overheating.
- Mfiduo wa Maji: Usiweke chaja kwenye maji au unyevu kupita kiasi.
- Vol. Sahihitage: Thibitisha kuwa juzuu ya uingizajitage matches the charger's specifications (120-240V AC).
- Correct Battery Type: Ensure the charger settings are appropriate for the connected battery type (e.g., open, sealed, gel, AGM).
3. Kuweka
3.1 Kufungua
Carefully remove the charger from its packaging. Inspect for any signs of damage during transit. Retain the packaging for future transport or storage.
3.2 Kuweka
Mount the charger in a dry, well-ventilated location. Ensure sufficient clearance around the unit for airflow. Use appropriate fasteners for the mounting surface.
3.3 Viunganishi vya Umeme
All electrical connections must comply with local regulations and standards.
3.3.1 Muunganisho wa Ingizo wa AC
- Ensure the AC power source is disconnected.
- Connect the AC input cable to the designated terminals on the charger.
- Verify correct polarity (Live, Neutral, Earth).
3.3.2 DC Output Connection (Battery Banks)
The Skylla-TG charger features two isolated DC outputs.
- Connect the main battery bank to the primary DC output terminals.
- Connect the starter or auxiliary battery (if applicable) to the secondary DC output terminals. The secondary output is limited to 4 Amps.
- Ensure correct polarity (positive to positive, negative to negative).
3.3.3 Muunganisho wa Kitambuzi cha Halijoto
Connect the supplied battery temperature sensor to the charger. Place the sensor on the battery bank to be charged. This allows the charger to automatically adjust charging voltage based on battery temperature, optimizing battery life.
3.3.4 Juzuutage Muunganisho wa Hisia
Unganisha juzuutage sense wires directly to the battery terminals. This compensates for voltage drop in the main wiring, ensuring accurate charging voltage at the battery.
4. Maagizo ya Uendeshaji
4.1 Kuwasha / Kuzima
Once all connections are secure, connect the AC input power. The charger will initiate its startup sequence. To power off, disconnect the AC input power.
4.2 Kuchaji Stages
The Skylla-TG charger utilizes a 3-stage regulated charging process:
- Wingi: Charges the battery at maximum current until the voltage reaches the absorption level.
- Kunyonya: Chaji kwa vol isiyobadilikatage, gradually reducing current, to fully charge the battery. The duration of this stage is adjustable via a switch.
- Kuelea: Maintains the battery at a lower, constant voltage to prevent self-discharge and keep it fully charged.
4.3 Adjustable Absorption Duration
The absorption duration can be adjusted using a switch on the unit to optimize charging for different battery types and conditions.
4.4 Intelligent Startup Function
The charger features an "Intelligent startup" function that prevents initiating a full charge cycle on an already charged battery, thus extending battery life.
4.5 Using as a Power Supply
Thanks to its perfectly stabilized output voltage, the Skylla-TG can be used as a power supply without requiring connected batteries.
4.6 GMDSS Monitoring
The charger offers integrated GMDSS monitoring and alarm functions. All data and alarms can be displayed on a digital panel (VE.Net GMDSS panel, sold separately) for comprehensive system oversight.
5. Matengenezo
Regular maintenance ensures optimal performance and longevity of your charger:
- Kusafisha: Periodically clean the exterior of the charger with a dry cloth. Do not use solvents or abrasive cleaners. Ensure ventilation openings are free from dust and debris.
- Viunganisho: Annually check all electrical connections for tightness and corrosion. Tighten any loose connections.
- Ukaguzi wa Betri: Regularly inspect batteries for signs of damage, leakage, or corrosion.
6. Utatuzi wa shida
This section provides solutions to common issues. If the problem persists, contact Victron Energy support.
| Tatizo | Sababu inayowezekana | Suluhisho |
|---|---|---|
| Chaja haiwaki | No AC input power; Blown fuse; Loose connections. | Check AC power supply; Inspect and replace fuse if necessary; Verify all connections are secure. |
| Betri haichaji | Incorrect battery connections; Battery deeply discharged; Faulty battery. | Check DC output connections and polarity; Allow charger time to recover deeply discharged battery (if possible); Test battery condition. |
| Kuzidisha joto | Uingizaji hewa usiotosha; Kuzidisha mzigo. | Ensure adequate airflow around the charger; Reduce load if used as power supply; Check for obstructions in ventilation openings. |
| GMDSS alarm | Betri voltage outside limits; System fault. | Consult the VE.Net GMDSS panel for specific alarm details; Check battery status and system connections. |
7. Maelezo ya kiufundi
| Vipimo | Thamani |
|---|---|
| Chapa | Nishati ya Victoria |
| Nambari ya Mfano | SDTG2400302 |
| Uingizaji Voltage | Volts 120-240 AC |
| Pato Voltage | 24 Volts DC |
| Ukadiriaji wa Sasa | 30 Amps |
| Idadi ya Bandari | 2 (Main + Auxiliary) |
| Vipimo vya Bidhaa (D x W x H) | 5.79"D x 9.84"W x 19.09"H |
| Uzito wa Kipengee | Kilo 7.4 |
| Rangi | Bluu |
8. Udhamini na Msaada
Victron Energy products are designed for reliability and performance. For specific warranty terms and conditions, please refer to the warranty card included with your product or visit the official Victron Energy website. For technical support, service, or spare parts, please contact your authorized Victron Energy dealer or distributor.
No official product videos were provided in the source data for embedding in this manual.